Applying gel polish on natural nails can give a professional, long-lasting, and shiny manicure. While it might seem complicated, following the right steps will make the process easy and help you achieve salon-quality results at home. Here’s a step-by-step guide on how to apply gel polish on natural nails.
Materials Needed:
- Nail file and buffer
- Cuticle pusher
- Lint-free wipes
- Rubbing alcohol or nail cleanser
- Gel base coat
- Gel color polish
- Gel top coat
- UV or LED lamp
- Nail oil (optional)
Step 1: Prepare Your Nails
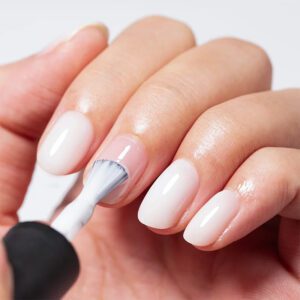
Start by shaping your natural nails with a nail file. Whether you prefer round, square, or almond-shaped nails, ensure they are even and smooth. After shaping, lightly buff the surface of your nails with a buffer to remove the shine. This helps the gel polish adhere better to the nail.
Step 2: Clean Your Nails
Use a lint-free wipe soaked in rubbing alcohol or nail cleanser to clean your nails. This step removes any dust, oil, or debris left from buffing. Make sure your nails are completely dry and oil-free, as this helps prevent lifting of the polish later on.
Step 3: Push Back Cuticles
Gently push back your cuticles with a cuticle pusher. This step is important because it creates a clean nail surface and prevents gel polish from sticking to the cuticle area, which can cause peeling.
Step 4: Apply Gel Base Coat
Apply a thin layer of gel base coat to each nail. Be careful not to get any on your skin or cuticles. The base coat is crucial because it helps the gel polish adhere to the nail and protects your natural nails. Cure the base coat under a UV or LED lamp according to the manufacturer’s instructions (usually 30-60 seconds under an LED lamp).
Step 5: Apply Gel Color Polish
After the base coat is cured, apply a thin layer of gel color polish. Use even strokes, starting from the center of the nail and then to the sides. Thin layers are essential to prevent bubbling or uneven curing. Cure the first coat under the lamp, then repeat the process for a second coat to ensure full coverage.
Step 6: Apply Gel Top Coat
Once the color polish is cured, apply a gel top coat. The top coat seals the gel polish, adds shine, and increases the durability of your manicure. Apply a thin, even layer, ensuring to “cap” the edge of your nail by brushing along the tip. This helps prevent chipping. Cure the top coat under the UV or LED lamp.
Step 7: Clean Off the Sticky Layer
After curing the top coat, your nails will have a sticky residue. Use a lint-free wipe with rubbing alcohol to gently wipe off this sticky layer, leaving your nails smooth and shiny.
Step 8: Apply Nail Oil (Optional)
For an extra touch of nourishment, apply cuticle oil around your nails. This keeps your cuticles healthy and adds moisture to your nails, preventing them from becoming dry.
Tips for Long-Lasting Gel Polish:
- Avoid applying thick layers of gel polish, as this can cause wrinkling or peeling.
- Always cap the free edge of the nail to help prevent chipping.
- Be sure to cure each layer properly to avoid smudging or uneven application.
- Store your gel polishes in a cool, dry place to maintain their quality.
By following these steps, you’ll be able to apply gel polish on natural nails like a pro! With a bit of practice and patience, you’ll enjoy a flawless, glossy manicure that lasts for weeks without chipping or fading.